Installing a new backsplash is a fantastic way to give your kitchen a fresh, updated look and significantly boost its value! Imagine walking into a kitchen that’s both beautiful and functional, with a backsplash that perfectly complements your style. A backsplash is a wall covering behind the stove, sink, and other kitchen appliances that protects the wall from spills, stains, and heat. Many homeowners face challenges like determining the right backsplash materials, calculating precise measurements, and managing the complexity of installation. This guide meticulously breaks down the entire process, from initial planning to final installation, offering expert advice and actionable steps to make your DIY backsplash project a success. We’ll explore the different options available, discuss budget-friendly choices, and provide crucial tips for achieving a professional-looking finish. Get ready to transform your kitchen—we’ve got you covered! This guide will outline the essential steps, from choosing materials to final touches.
Choosing the Right Backsplash Materials
Understanding Your Needs and Preferences
Selecting the right backsplash material is crucial for both aesthetics and practicality. Consider factors like your kitchen’s style, budget, and desired level of durability. Popular options include ceramic tile, porcelain tile, glass tile, stone, and even metal. Each material offers unique advantages and disadvantages in terms of cost, installation complexity, and durability. Do extensive research and compare prices before making your final decision.
Budget-Friendly Alternatives
Sometimes, the most beautiful backsplashes are also the most affordable. Explore budget-friendly alternatives like ceramic or porcelain tile, especially if your focus is on practicality and easy maintenance. These materials are often readily available and come in a wide array of colors, patterns, and sizes. This way you can maximize your budget without sacrificing style!
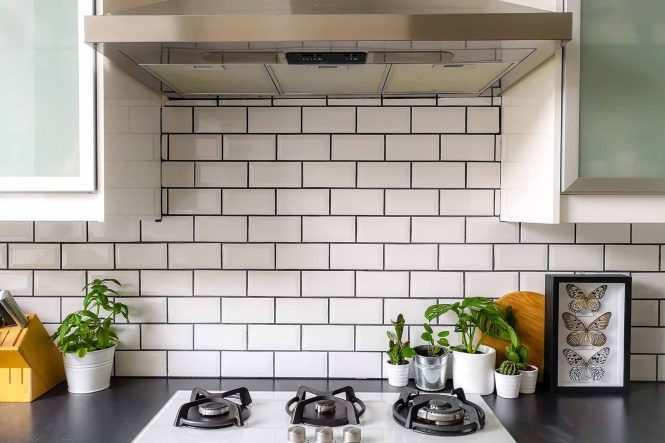
Tile Types
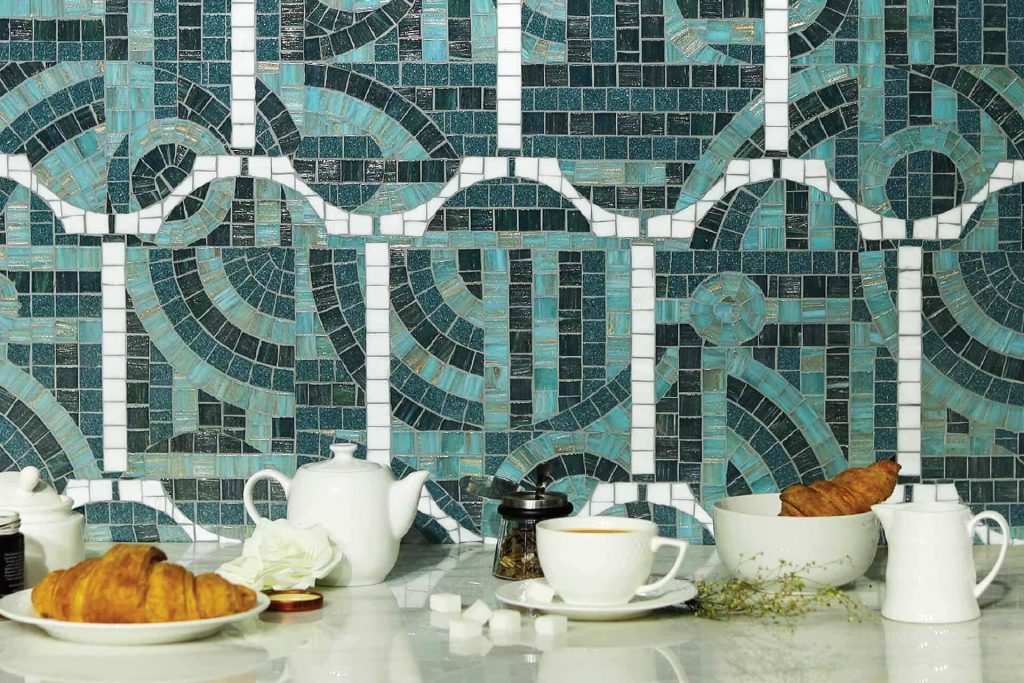
Familiarize yourself with the different types of tile available, such as ceramic, porcelain, glass, or stone. Ceramic tiles are a classic and cost-effective choice, while porcelain tiles are known for their strength and durability. Glass tiles add a touch of elegance and create a visually stunning backsplash. Consider stone tiles for a touch of natural beauty or metal for a modern, sleek design. The choice is yours, and it all comes down to your personal preferences.
Planning Your Backsplash Design
Measuring Accurately
Accurate measurements are paramount for a successful installation. Use a tape measure to determine the precise dimensions of the area you’ll be covering. Take detailed notes or use a blueprint to ensure accurate cutting and installation. Double-checking your measurements minimizes errors and ensures a perfect fit. Be sure to factor in grout lines and any necessary allowances. Remember to measure twice and cut once!
Design Considerations
Think about the overall aesthetic you’re aiming for. Consider factors such as color schemes, patterns, and textures. A clean, minimalist design might work well in a modern kitchen, while a more intricate pattern could be suitable for a traditional setting. Balance style and functionality to create a kitchen that both impresses and meets your everyday needs.
Choosing a Layout
Explore different layout options, such as a classic subway tile design or a more contemporary mosaic pattern. Consider symmetry and balance in your layout to create a visually appealing and harmonious backsplash. Remember, the layout should align with the overall style of your kitchen.
Preparing the Kitchen Surface
Surface Preparation
Thoroughly clean and prepare the area where you’ll be installing the backsplash. Remove any existing backsplash or covering and ensure the wall is clean and dry. Fill any cracks or holes and ensure that the wall is stable and level before starting. This ensures the longevity and structural integrity of your backsplash installation.
Caulking and Grouting
Proper caulking is essential to creating a watertight seal around the edges of the backsplash. Use a quality caulk and apply it evenly to the edges. Grouting is equally important. Ensure that the grout is the right color and consistency, and apply it carefully to fill the spaces between the tiles. Clean up excess grout promptly to maintain a neat and professional finish.
Setting Expectations
Installing a backsplash requires preparation. Plan ahead, gather all the necessary materials, and set realistic expectations for the duration of the project. This preparation is key to a smooth and successful installation.
Installing the Backsplash
Tile Placement
Carefully arrange the tiles in the desired pattern, ensuring even spacing and alignment. Use spacers to maintain the correct gaps. Carefully adhere each tile to the wall using the appropriate adhesive. Ensure even pressure and spacing to avoid uneven installations. Don’t hesitate to take breaks if needed.
Completing the Project
Grouting and Finishing
Once the tiles are set, grout the spaces between them. Allow the grout to dry completely before cleaning away excess. A well-applied grout finish is vital for the longevity and visual appeal of your backsplash.
Sealants and Caulking
Apply sealant to the perimeter and around any visible seams to prevent moisture damage. Ensure a clean and finished appearance.
Clean Up and Final Inspection
Thoroughly clean the backsplash, removing any residual adhesive or grout. Review and inspect the installed backsplash for any imperfections. Correct any minor issues for a perfect finish. A smooth, uniform backsplash is the goal!
In conclusion, installing a new backsplash is a rewarding DIY project that can significantly enhance the look and value of your kitchen. Remember to meticulously plan your design, choose quality materials, and follow the detailed steps outlined in this guide. With careful execution, you can successfully complete this project within your budget and timeline. Ready to transform your kitchen? Get started now! Explore our backsplash design inspiration gallery for more ideas.