
Installing new hardware yourself can be a rewarding experience, saving you money and boosting your technical skills. Imagine building a high-performance gaming rig or upgrading your existing system with ease. This guide will equip you with the knowledge and confidence to tackle any hardware installation project, from installing a new graphics card to adding a high-capacity hard drive. The process might seem daunting at first, but by following a methodical approach, you can achieve professional-grade results. This guide will systematically walk you through the entire process, covering everything from essential preparation to final testing. We will address common issues and provide troubleshooting tips along the way to make sure your project is a success.
Planning and Preparation: Laying the Foundation for Success
Understanding Your Hardware Requirements
Before diving into the installation process, it’s crucial to carefully review the specifications of your new hardware components. Ensure compatibility with your existing system; it’s a common pitfall to assume compatibility without checking. Verify the compatibility of your existing components with the new hardware. This ensures that everything works together seamlessly. Consider factors such as your motherboard’s capacity for new RAM or the power supply’s capabilities. In essence, compatibility is critical for a smooth installation experience. Always consult the manufacturer’s documentation and use online resources to verify your system compatibility.
Gathering Necessary Tools and Materials
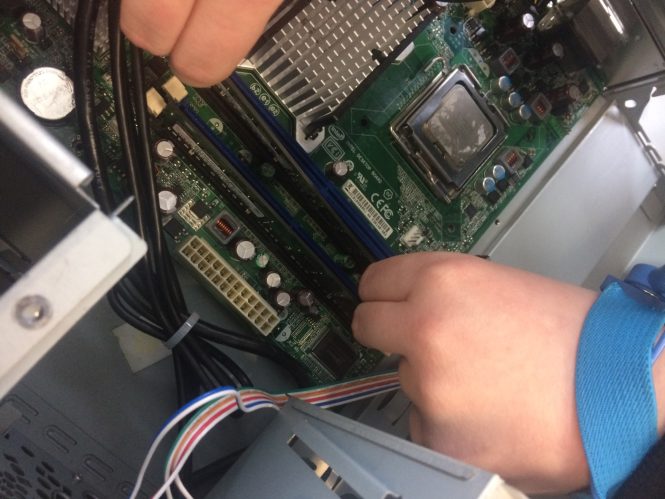
Having the right tools is essential for a successful installation. Gather static-safe wrist straps, screwdrivers, and any other required tools. Verify the need for any specific tools for the components. Ensure you have all necessary hardware components and spare parts. Don’t underestimate the importance of anti-static wrist straps; they protect your components from damage due to static electricity. You’ll need different types of screwdrivers depending on the hardware.
Step-by-Step Installation: A Detailed Guide
Installing the Motherboard and CPU
Installing the motherboard and CPU is a crucial step. Begin with carefully opening the computer case and ensuring a clean work surface. Position the motherboard and CPU carefully, aligning the slots and pins correctly. Secure the mounting screws and connect the CPU cooler carefully. Secure the motherboard to the case with mounting screws and install the CPU with caution. Check for proper seating and secure mounting of the CPU and cooler.
Memory Modules and Storage Devices
Installing RAM and storage is usually straightforward. Check the motherboard’s manual for compatible RAM slots and specifications. Carefully insert the RAM modules into their designated slots, ensuring they are seated correctly. Installing storage devices like SSDs and HDDs often requires attaching them to the motherboard or case’s internal bays. Always follow the manufacturer’s instructions carefully when installing these components.
Connecting Peripherals and Power Supplies
Connecting Peripherals
Connecting peripherals like graphics cards, sound cards, and network cards is a significant part of the process. Refer to the manufacturer’s guide for the specifics; different cards can require different connections. Ensure each connector is correctly aligned before attaching it. Confirm every connection is secure and appropriately positioned for proper functioning.
Power Supply Connections
Carefully connect the power supply cables to the relevant components. Ensure the correct polarity to avoid any potential damage. Follow the wiring diagram; ensure all components are adequately powered and the connections are secure. It’s essential to check the instructions provided by the manufacturers.
Final Steps and Testing
Checking Connectivity and Settings
Double-check all connections before closing the computer case. Test each component individually to ensure it operates properly. Be meticulous about each connection to avoid any unexpected issues. Thoroughly check all cables and connectors for proper insertion. Confirm each component is functioning as expected.
Reassembling the Computer Case
Carefully reassemble the computer case by carefully fastening all screws and ensuring no cables are pinched. Ensure proper alignment and secure connections before closing the case. Check all connections and carefully position all components. Secure all parts to prevent any shifting or damage.
Troubleshooting Common Issues
Identifying and Addressing Problems
Troubleshooting is an important part of the installation process. Common problems include insufficient power, incompatible hardware, and incorrect installation. Use available resources to diagnose and solve problems; understand the signs of power issues or compatibility problems. Identify the source of the problem by systematically testing each component. Refer to manufacturer documentation and online resources for comprehensive solutions. Consult with a technical expert if necessary.
In conclusion, installing new hardware yourself can save you money and provide valuable hands-on experience. By carefully researching your hardware needs, following step-by-step guides, and troubleshooting potential issues, you can confidently tackle any installation project. This guide has provided you with comprehensive knowledge and actionable steps to enhance your technical skills. If you’re not comfortable, it’s always best to consult a professional. Remember, proper installation ensures longevity and optimal performance of your new hardware components. Now go forth and conquer your hardware installations!