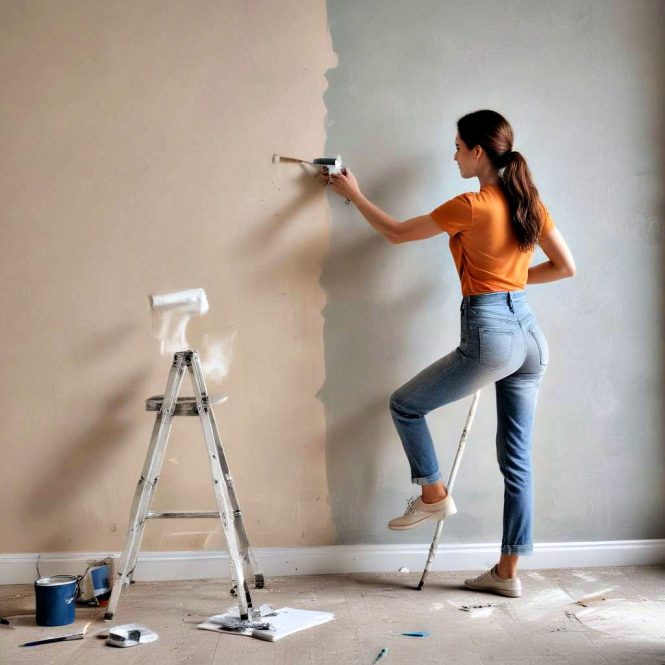
DIY painting tips for a light renovation can be a game-changer for your home’s aesthetic and feel. Transforming your living space doesn’t always mean a complete overhaul. A fresh coat of paint can work wonders for creating a brighter and more inviting atmosphere. Many people hesitate to take on painting projects themselves, fearing mistakes or a lack of experience. However, with the right guidance, DIY painting can be surprisingly straightforward and enjoyable, significantly improving your home without needing to break the bank. This guide will cover essential preparation steps, effective painting techniques, and helpful tips for achieving stunning results, ensuring your DIY painting project is a success. This article will outline all the key elements of DIY painting, from planning your colors to painting the final touches. Let’s dive in and uncover how to refresh your space effectively.
Planning and Preparation: The Foundation of a Successful DIY Painting Project
Choosing the Right Paint Colors
Selecting the right paint colors for a light renovation is vital to achieving the desired look. Consider the overall mood you want to create. A calming color palette might involve soft blues and greens, while a more vibrant feel could be achieved with bolder hues. Consider the existing decor. If you have a lot of furniture, you might want to opt for a more neutral color to allow the furniture to be the main focus. Knowing your desired effect will help you make informed choices that complement your style and brighten your home.
Preparing the Surfaces
Thorough preparation is crucial to achieving a flawless finish. Cleaning the walls is the first step. Remove any loose paint, dirt, or debris. Filling any holes or imperfections with spackle is essential for a smooth surface. Sanding the area to be painted is crucial for achieving a smooth surface, ensuring the paint adheres better and creating a professional-looking finish. It is crucial to account for all the different elements and be prepared for unforeseen situations.
Gathering Your Supplies
Essential supplies for your DIY painting project include good quality paint, brushes, rollers, drop cloths, and painter’s tape. Ensure you have enough of each item to complete the project efficiently. Consider purchasing a variety of brush sizes and rollers to ensure you have the right tools for each section.
Mastering the Painting Techniques: From Prep to Finish
Applying Primer
Applying primer before painting is vital for a smooth, even finish. Primer helps the paint adhere better and prevents imperfections from showing through. Use a good-quality primer for optimal results, one appropriate for your type of wall. The primer will create an even surface to work with, ensuring that the paint adheres properly, creating an even surface to work with. This is a crucial step to avoiding the paint peeling or flaking.
Rolling Techniques
Mastering rolling techniques is key to achieving a smooth and consistent finish. Use a good quality paint roller, and use long, overlapping strokes to ensure even coverage. Avoid excessive pressure, as this can lead to streaks. The roller size should match the surface area to paint.
Brush Techniques
Using the appropriate brush for details is equally important. Smaller brushes are perfect for painting around edges, corners, and trim work. Ensure your brush strokes are consistent and overlap slightly to avoid visible lines. A high-quality brush will make painting edges and intricate details effortless.
Painting Different Surfaces: Walls, Trim, and Ceilings
Painting Walls
Painting walls effectively involves considering the size of the wall and the type of paint used. If the wall is large, use long, overlapping strokes to ensure even coverage. Start from the top and work your way down. Consider using different techniques for different sections to ensure you’re using the appropriate tools to complete your project.
Painting Trim
Painting trim requires precision. Use painter’s tape to mask areas carefully. Employ a small, high-quality brush to paint around edges and corners accurately. Don’t forget to clean up any missed areas carefully to ensure a professional finish.
Painting Ceilings
Painting ceilings effectively requires a steady hand. Use a roller with a suitable extension handle to cover larger ceiling sections. Start from one corner and move across in consistent, overlapping strokes to ensure even coverage, preventing drips and streaks.
Troubleshooting and Finishing Touches
Handling Drips and Splashes
Drips and splashes are common occurrences. Use a damp cloth or paper towel to remove any excess paint quickly. This will avoid any unwanted marks and help maintain the pristine look of your work.
Fixing Mistakes
Addressing mistakes quickly is essential for a smooth paint job. Immediately scrape off any unintended paint with a putty knife. If the mistake is severe, use a quality remover. If the issue is a significant misstep, consider re-applying a fresh coat of primer and paint.
Final Inspection and Touch-ups
Taking your time to review the overall painting is crucial. Check every corner and edge for any imperfections. Touch-ups may be needed to improve your work.
Advanced Tips and Techniques for Professional Results
Using Different Paint Finishes
Exploring different paint finishes allows you to personalize your project. Choosing the right finish is vital, as it affects the look, feel, and longevity of the paint job. Matte paint gives a more subtle, low-shine finish, while a satin finish provides a slight shimmer. Consider your needs and desires for your walls. Experimenting with textures is also an option.
Working in Stages
Painting in stages can be incredibly useful. Completing smaller sections allows you to rest or avoid getting tired, increasing your likelihood of completing the entire painting job without stress or frustration.
Applying multiple coats if necessary
Apply multiple coats as required for an even finish, ensuring all colors are applied according to the manufacturer’s instructions.
In conclusion, DIY painting is a fantastic way to refresh your home without breaking the bank or hiring a professional. By following these tips, you can confidently tackle a light renovation and achieve stunning results. Remember, preparation is key, and careful execution will lead to a beautiful and lasting transformation. Don’t hesitate to experiment and have fun with the process! Now go forth and paint! If you have any more questions, please don’t hesitate to visit our FAQ section below for answers.